FirebaseAuthを使ったLoginのcodelab。
1と2に分かれているが、まとめてやってしまっていいボリューム感だった。
対象のcodelab
Advanced Android in Kotlin 06.1: Android Login with FirebaseUI
Advanced Android in Kotlin 06.2: Android Conditional Navigation with Login
このcodelabで学べること
- Firebaseをプロジェクトに追加する方法
- Androidアプリのログインをサポートする方法
- アプリの現在の認証ステータスを監視する方法
- ユーザーをログアウトさせる方法
- 認証ステータスに応じてNavigationで画面遷移する方法
FirebaseプロジェクトにAndroidを追加する
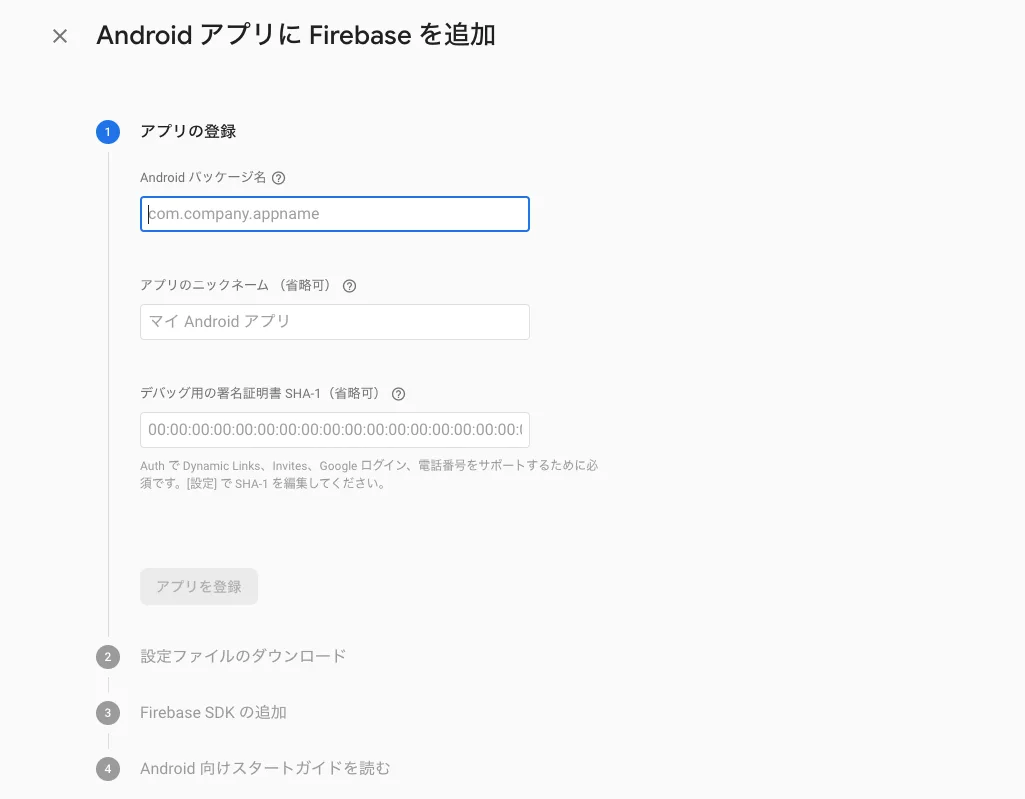
証明書SHA-1の生成
$ keytool -alias androiddebugkey -keystore ~/.android/debug.keystore -list -v -storepass android
FirebaseUIでloginして結果を受け取る
buttonクリック -> FirebaseAuthUIのActivityを呼び出し -> SingUp/SingInのonActivityResultで結果をもらう部分のコード。
AuthUIをbuildしたものをstartActivityForResultにわたすだけで組み込みがかなり簡単。
// MainFragment.kt

override fun onViewCreated(view: View, savedInstanceState: Bundle?) {
    super.onViewCreated(view, savedInstanceState)
    observeAuthenticationState()

    binding.authButton.setOnClickListener {
        // TODO call launchSignInFlow when authButton is clicked
        launchSignInFlow()
    }
}

override fun onActivityResult(requestCode: Int, resultCode: Int, data: Intent?) {
    super.onActivityResult(requestCode, resultCode, data)
    // TODO Listen to the result of the sign in process by filter for when
    //  SIGN_IN_REQUEST_CODE is passed back. Start by having log statements to know
    //  whether the user has signed in successfully
    if (requestCode == SIGN_IN_RESULT_CODE) {
        val response = IdpResponse.fromResultIntent(data)
        if (resultCode == Activity.RESULT_OK) {
            Log.i(
                TAG,
                "Successfully signed in user ${FirebaseAuth.getInstance().currentUser?.displayName}"
            )
        } else {
            Log.i(TAG, "Sign in unsuccessful ${response?.error?.errorCode}")
        }
    }
}

private fun launchSignInFlow() {
    // TODO Complete this function by allowing users to register and sign in with
    //  either their email address or Google account.

    val providers = arrayListOf(
        AuthUI.IdpConfig.EmailBuilder().build(),
        AuthUI.IdpConfig.GoogleBuilder().build()
    )

    startActivityForResult(
        AuthUI.getInstance()
            .createSignInIntentBuilder()
            .setAvailableProviders(providers)
            .build(),
        SIGN_IN_RESULT_CODE
    )
}
実行時のログ
2020-06-06 16:24:20.842 11649-11649/com.example.android.firebaseui_login_sample I/MainFragment: Successfully signed in user kyokomidev
実行してみた画面遷移
| MainFragment | AuthUI(Provider選択) | AuthUI(Emailログイン) |
|---|---|---|
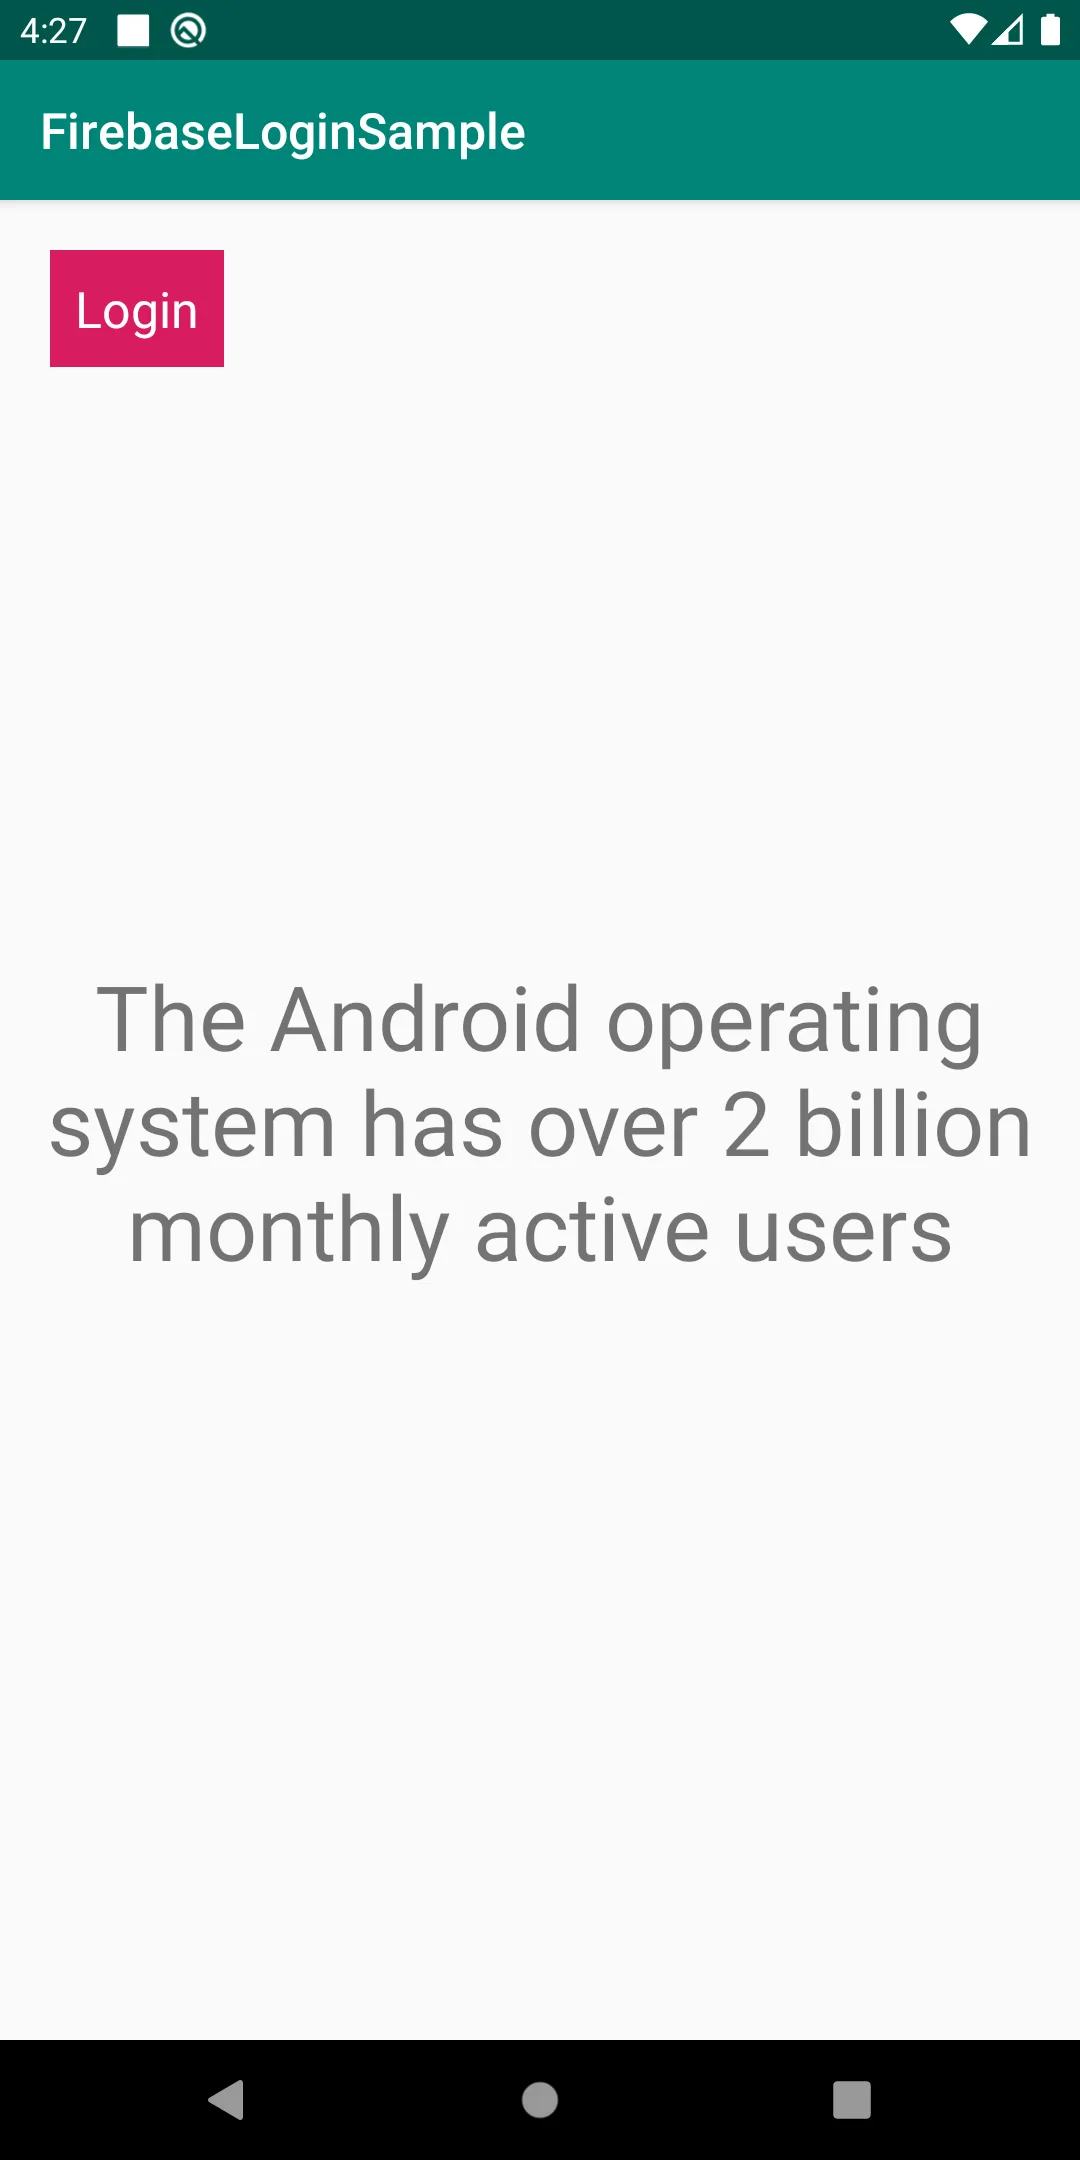 | 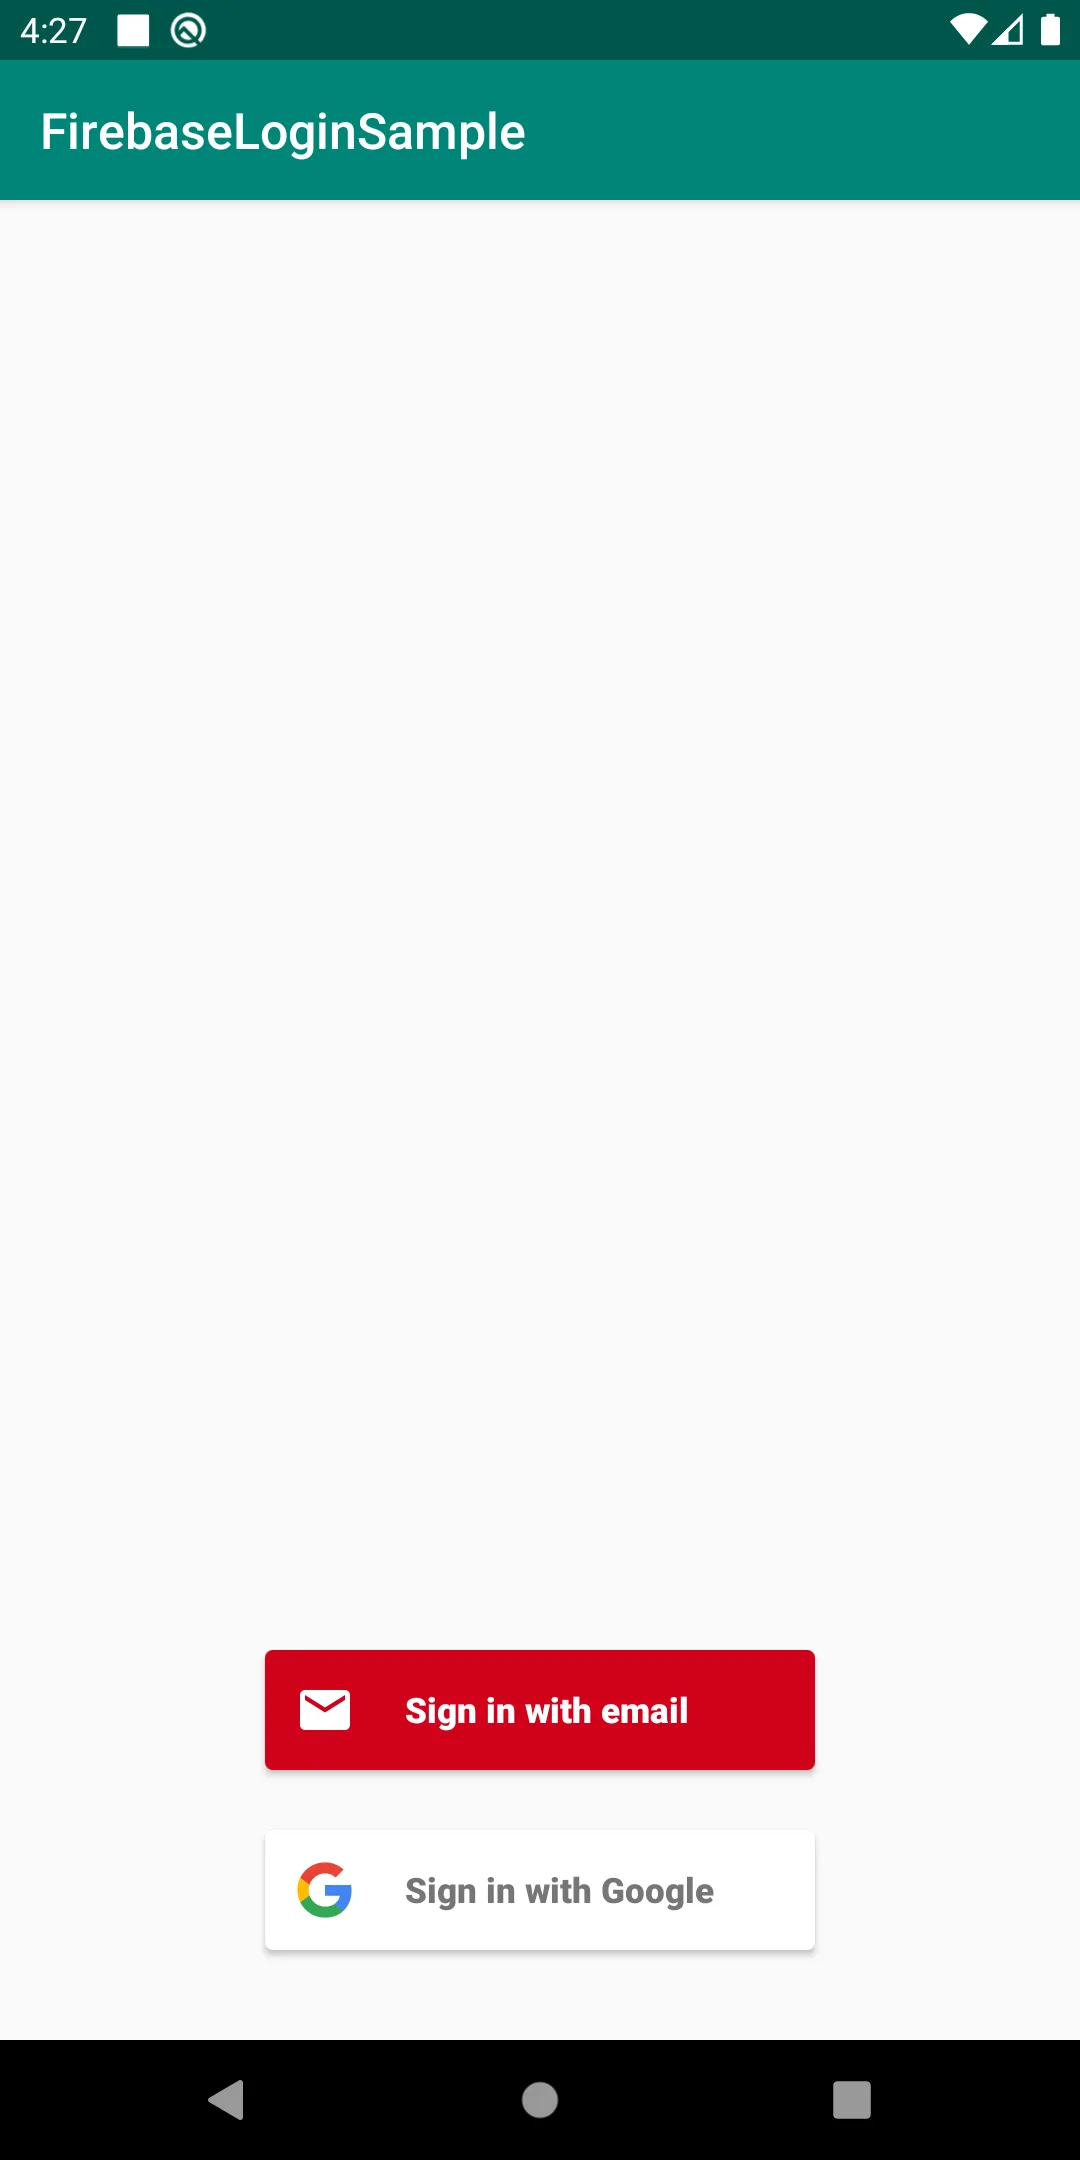 | 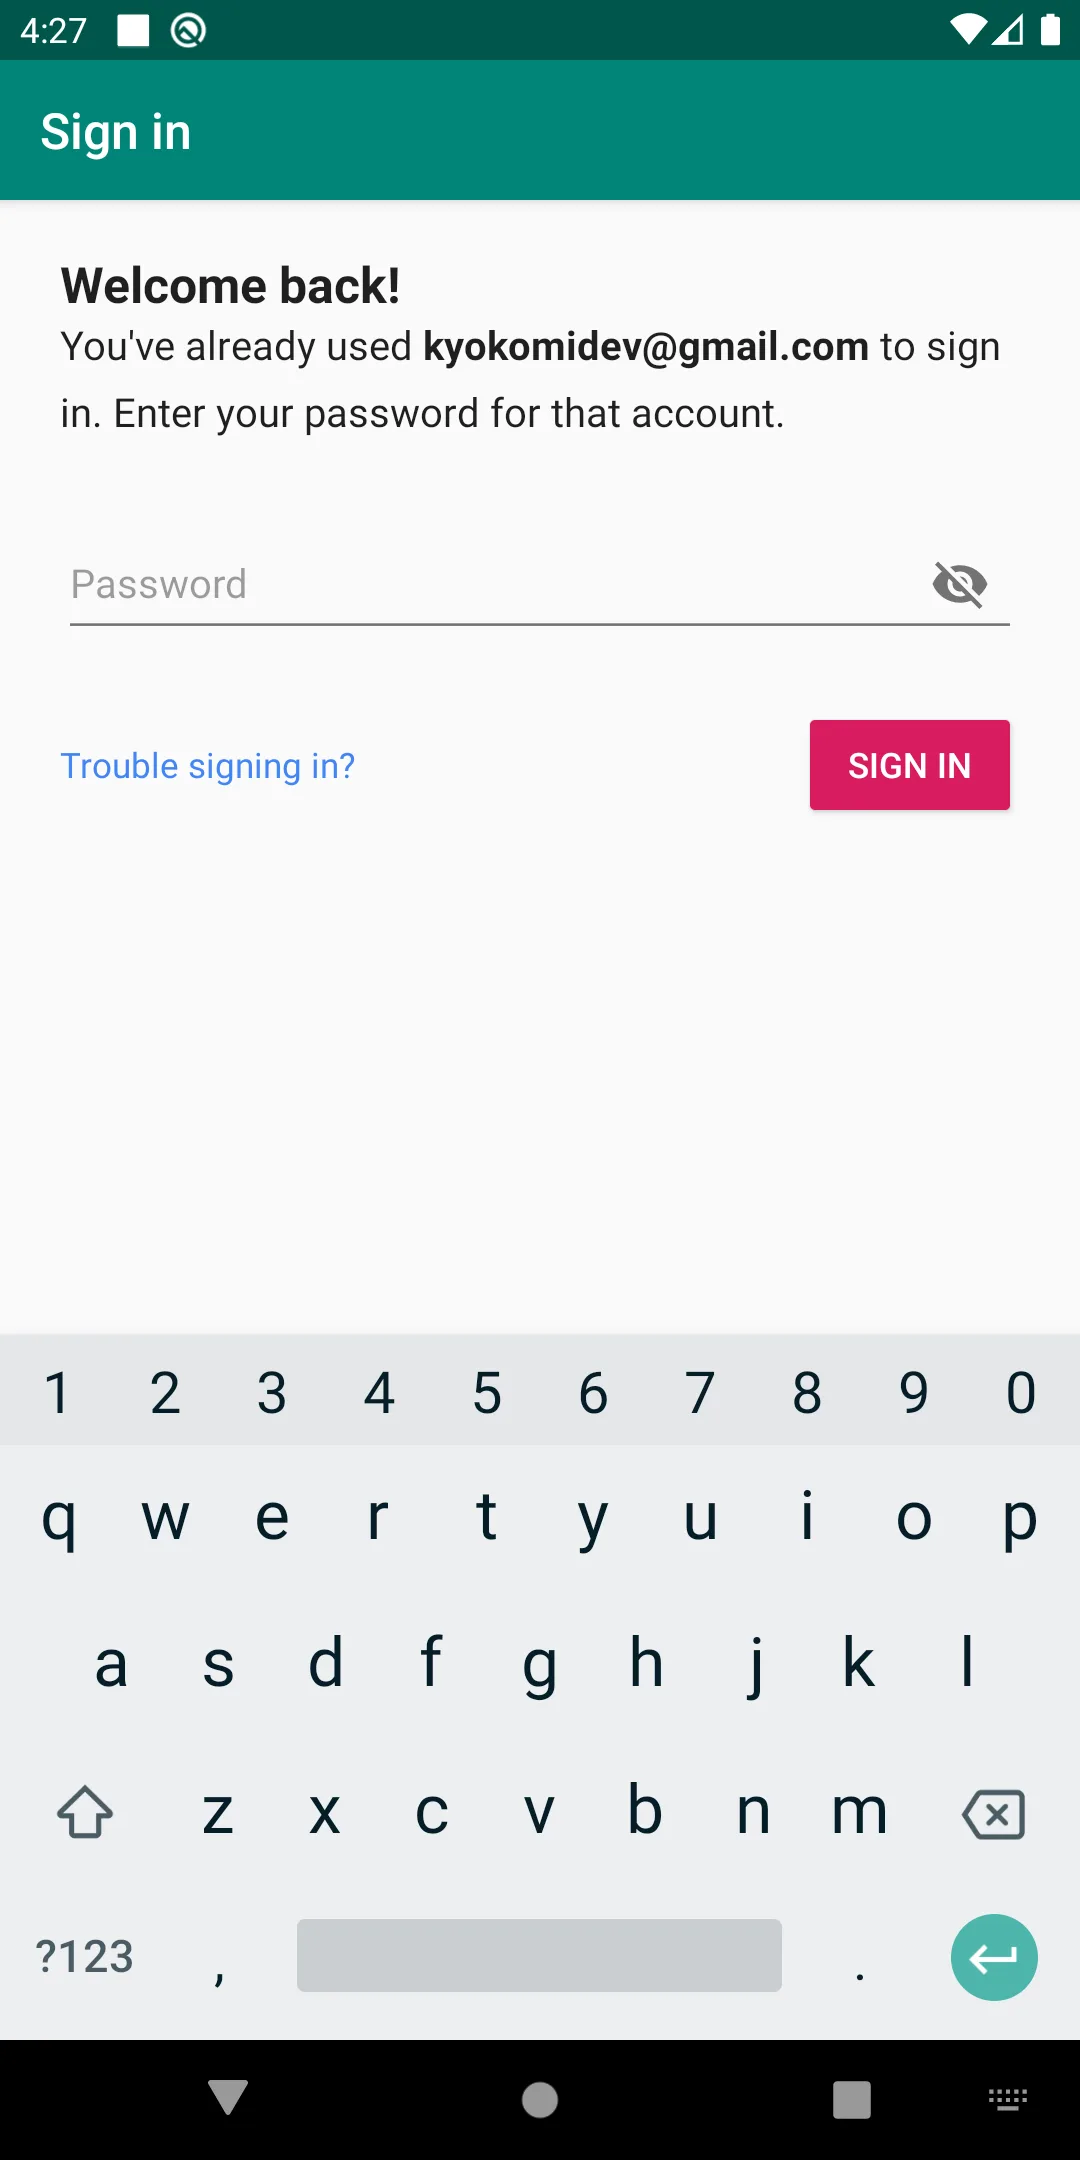 |
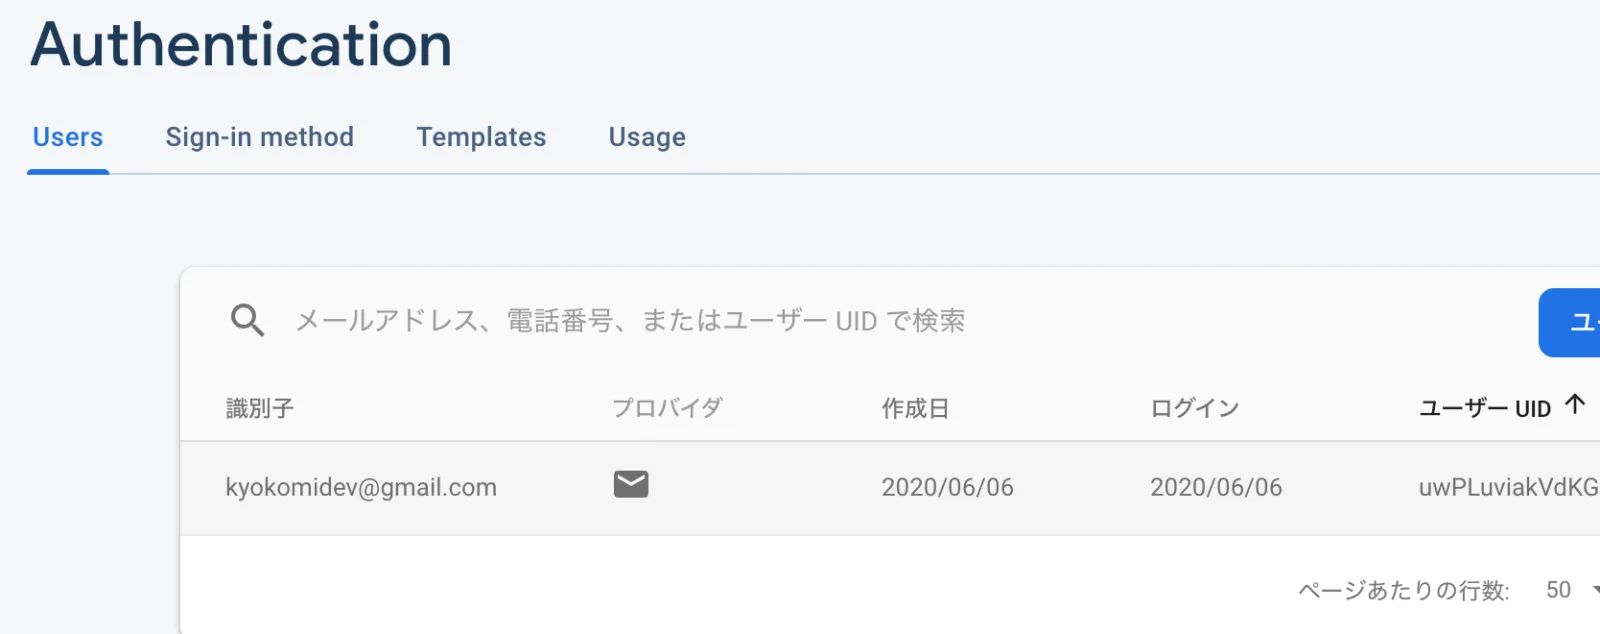
Firebaseのコンソール上でもuser登録されてるのを確認できる
Login状態の監視
LiveData継承してFirebaseAuth専用のLiveDataを作ってViewModelで参照する。
// FirebaseUserLiveData.kt

class FirebaseUserLiveData : LiveData<FirebaseUser?>() {
    private val firebaseAuth = FirebaseAuth.getInstance()

    private val authStateListener = FirebaseAuth.AuthStateListener { firebaseAuth ->
        value = firebaseAuth.currentUser
    }

    ...
}
// LoginViewModel.kt

var authenticationState = FirebaseUserLiveData().map { user ->
    if (user != null) {
        AuthenticationState.AUTHENTICATED
    } else {
        AuthenticationState.UNAUTHENTICATED
    }
}
// MainFragment.kt

private fun observeAuthenticationState() {
     val factToDisplay = viewModel.getFactToDisplay(requireContext())
     viewModel.authenticationState.observe(viewLifecycleOwner, Observer { authenticationState ->
         when (authenticationState) {
             LoginViewModel.AuthenticationState.AUTHENTICATED -> {
                 binding.authButton.text = getString(R.string.logout_button_text)
                 binding.authButton.setOnClickListener {
                     AuthUI.getInstance().signOut(requireContext())
                 }
                 binding.welcomeText.text = getFactWithPersonalization(factToDisplay)
             }
             else -> {
                 binding.authButton.text = getString(R.string.login_button_text)
                 binding.authButton.setOnClickListener {
                     launchSignInFlow()
                 }
                 binding.welcomeText.text = factToDisplay
             }
         }
     })
 }
これで、Loginの状況によってUIが変化するようになる。
| ログイン済み | 未ログイン |
|---|---|
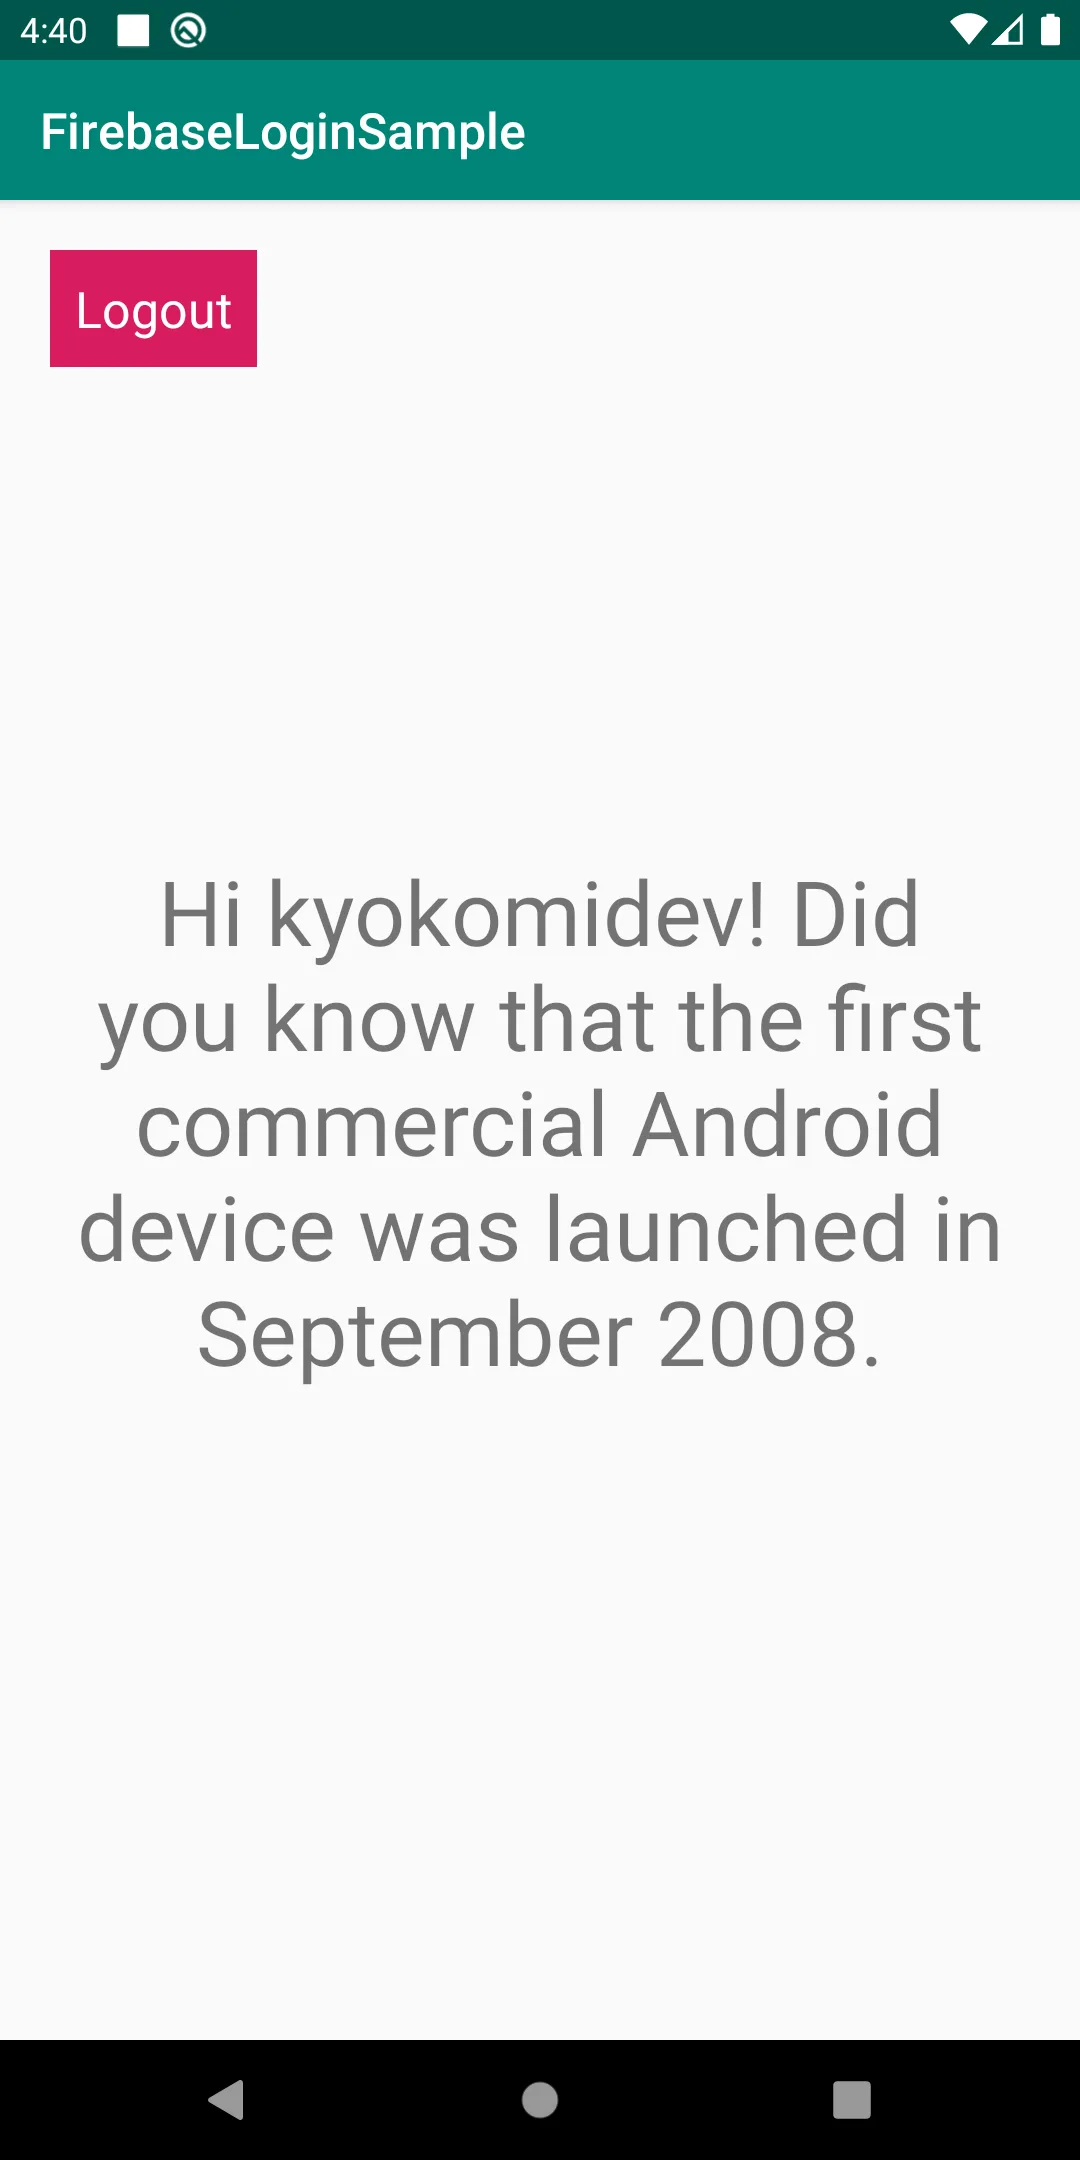 | 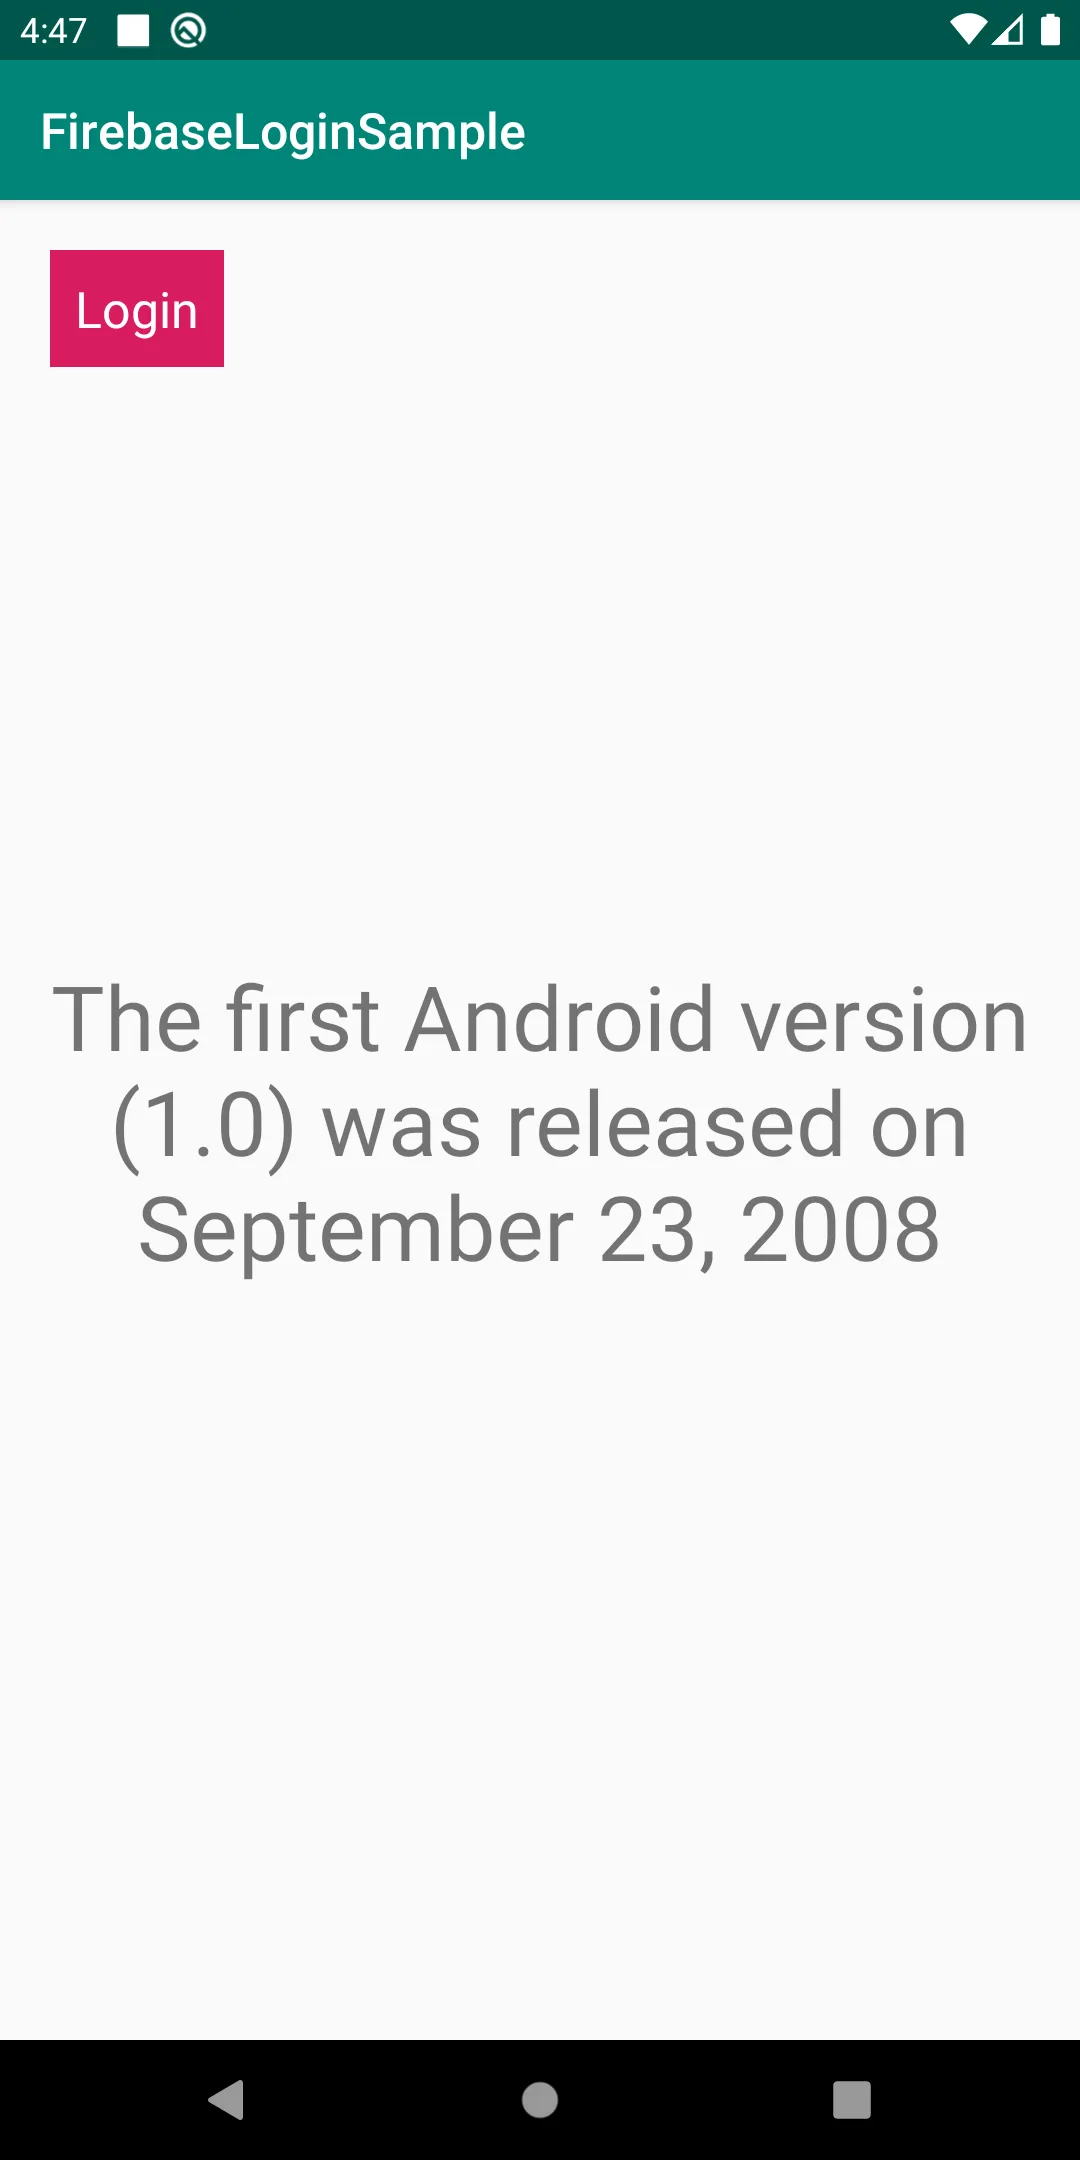 |
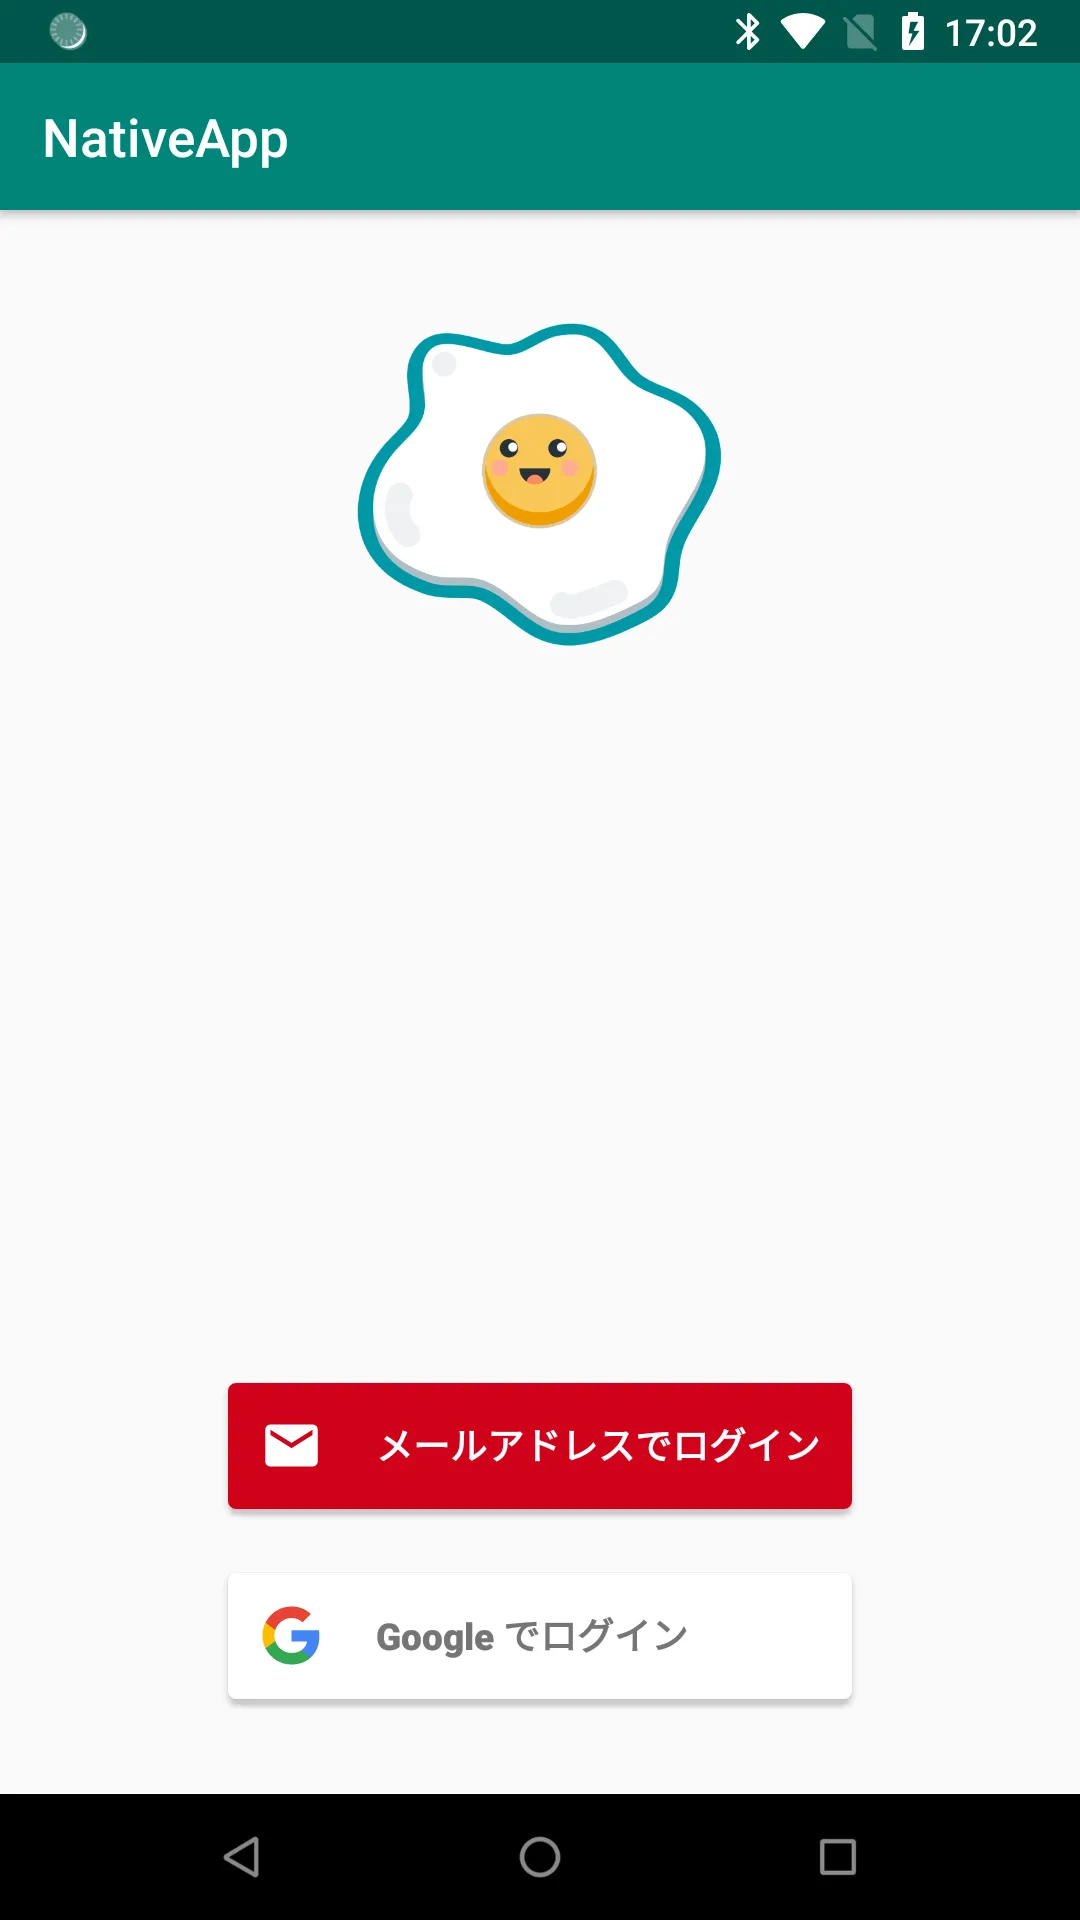
AuthUIおまけ
.setLogo(R.drawable.cooked_egg) とか足すと認証の画面をある程度カスタマイズできる。
他にもtheme設定など色々あるので、自前で作らなくて済みそう。
AuthUI.getInstance()
	.createSignInIntentBuilder()
	.setLogo(R.drawable.cooked_egg) // ロゴを設定
	.setAvailableProviders(providers)
	.build()
Navigationで画面遷移の設定
navigationで設定したactionをコードから呼び出すことができる。
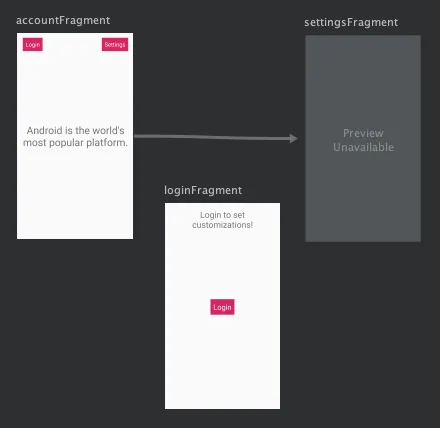
<fragment
    android:id="@+id/accountFragment"
    android:name="com.unity.mynativeapp.ui.account.AccountFragment"
    android:label="AccountFragment"
    tools:layout="@layout/fragment_account">
    <action
      android:id="@+id/action_accountFragment_to_settingsFragment"
      app:destination="@id/settingsFragment" />
  </fragment>
binding.settingsBtn.setOnClickListener {
	val action = AccountFragmentDirections.actionAccountFragmentToSettingsFragment()
	findNavController().navigate(action)
}
まとめ
- Login画面 -> FirebaseUIライブラリのUI -> onActivityResultの流れでログインの処理をする
- AuthUIは結構カスタマイズできる
- LiveDataを継承して現在の認証ステータスを監視する実装が便利
- ログイン状態を監視して、NavControllerを使って適切に画面遷移すると良い